 Power Viewer
eCTD Storages
Overview
This page explains how to prepare Power Viewer to access cloud storage such as SharePoint Online, Box, and Google Drive.
For how eCTD Storage relates to the album database and the group policy file, see System Layout & Where Things Live.
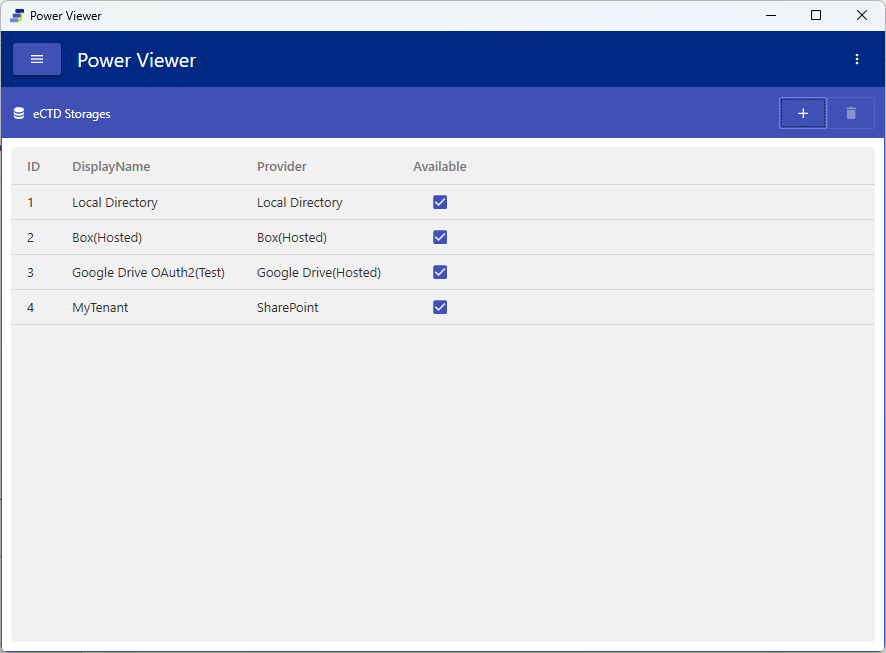
In Power Viewer, the location where a SubmissionUnit is stored (Local Directory, cloud storage, etc.) must be registered in advance as an “eCTD Storage.” Before you can add a SubmissionUnit, the eCTD Storage where that SubmissionUnit resides must already be registered. Note that some eCTD Storage settings, including Local Directory, are registered by default.
Registering a cloud storage as an eCTD Storage requires two stages of work:
- Preparation on the cloud storage side (the main focus of this page) — In the admin console of SharePoint Online, Box, or Google Drive, create and configure an OAuth client (application) that grants Power Viewer access.
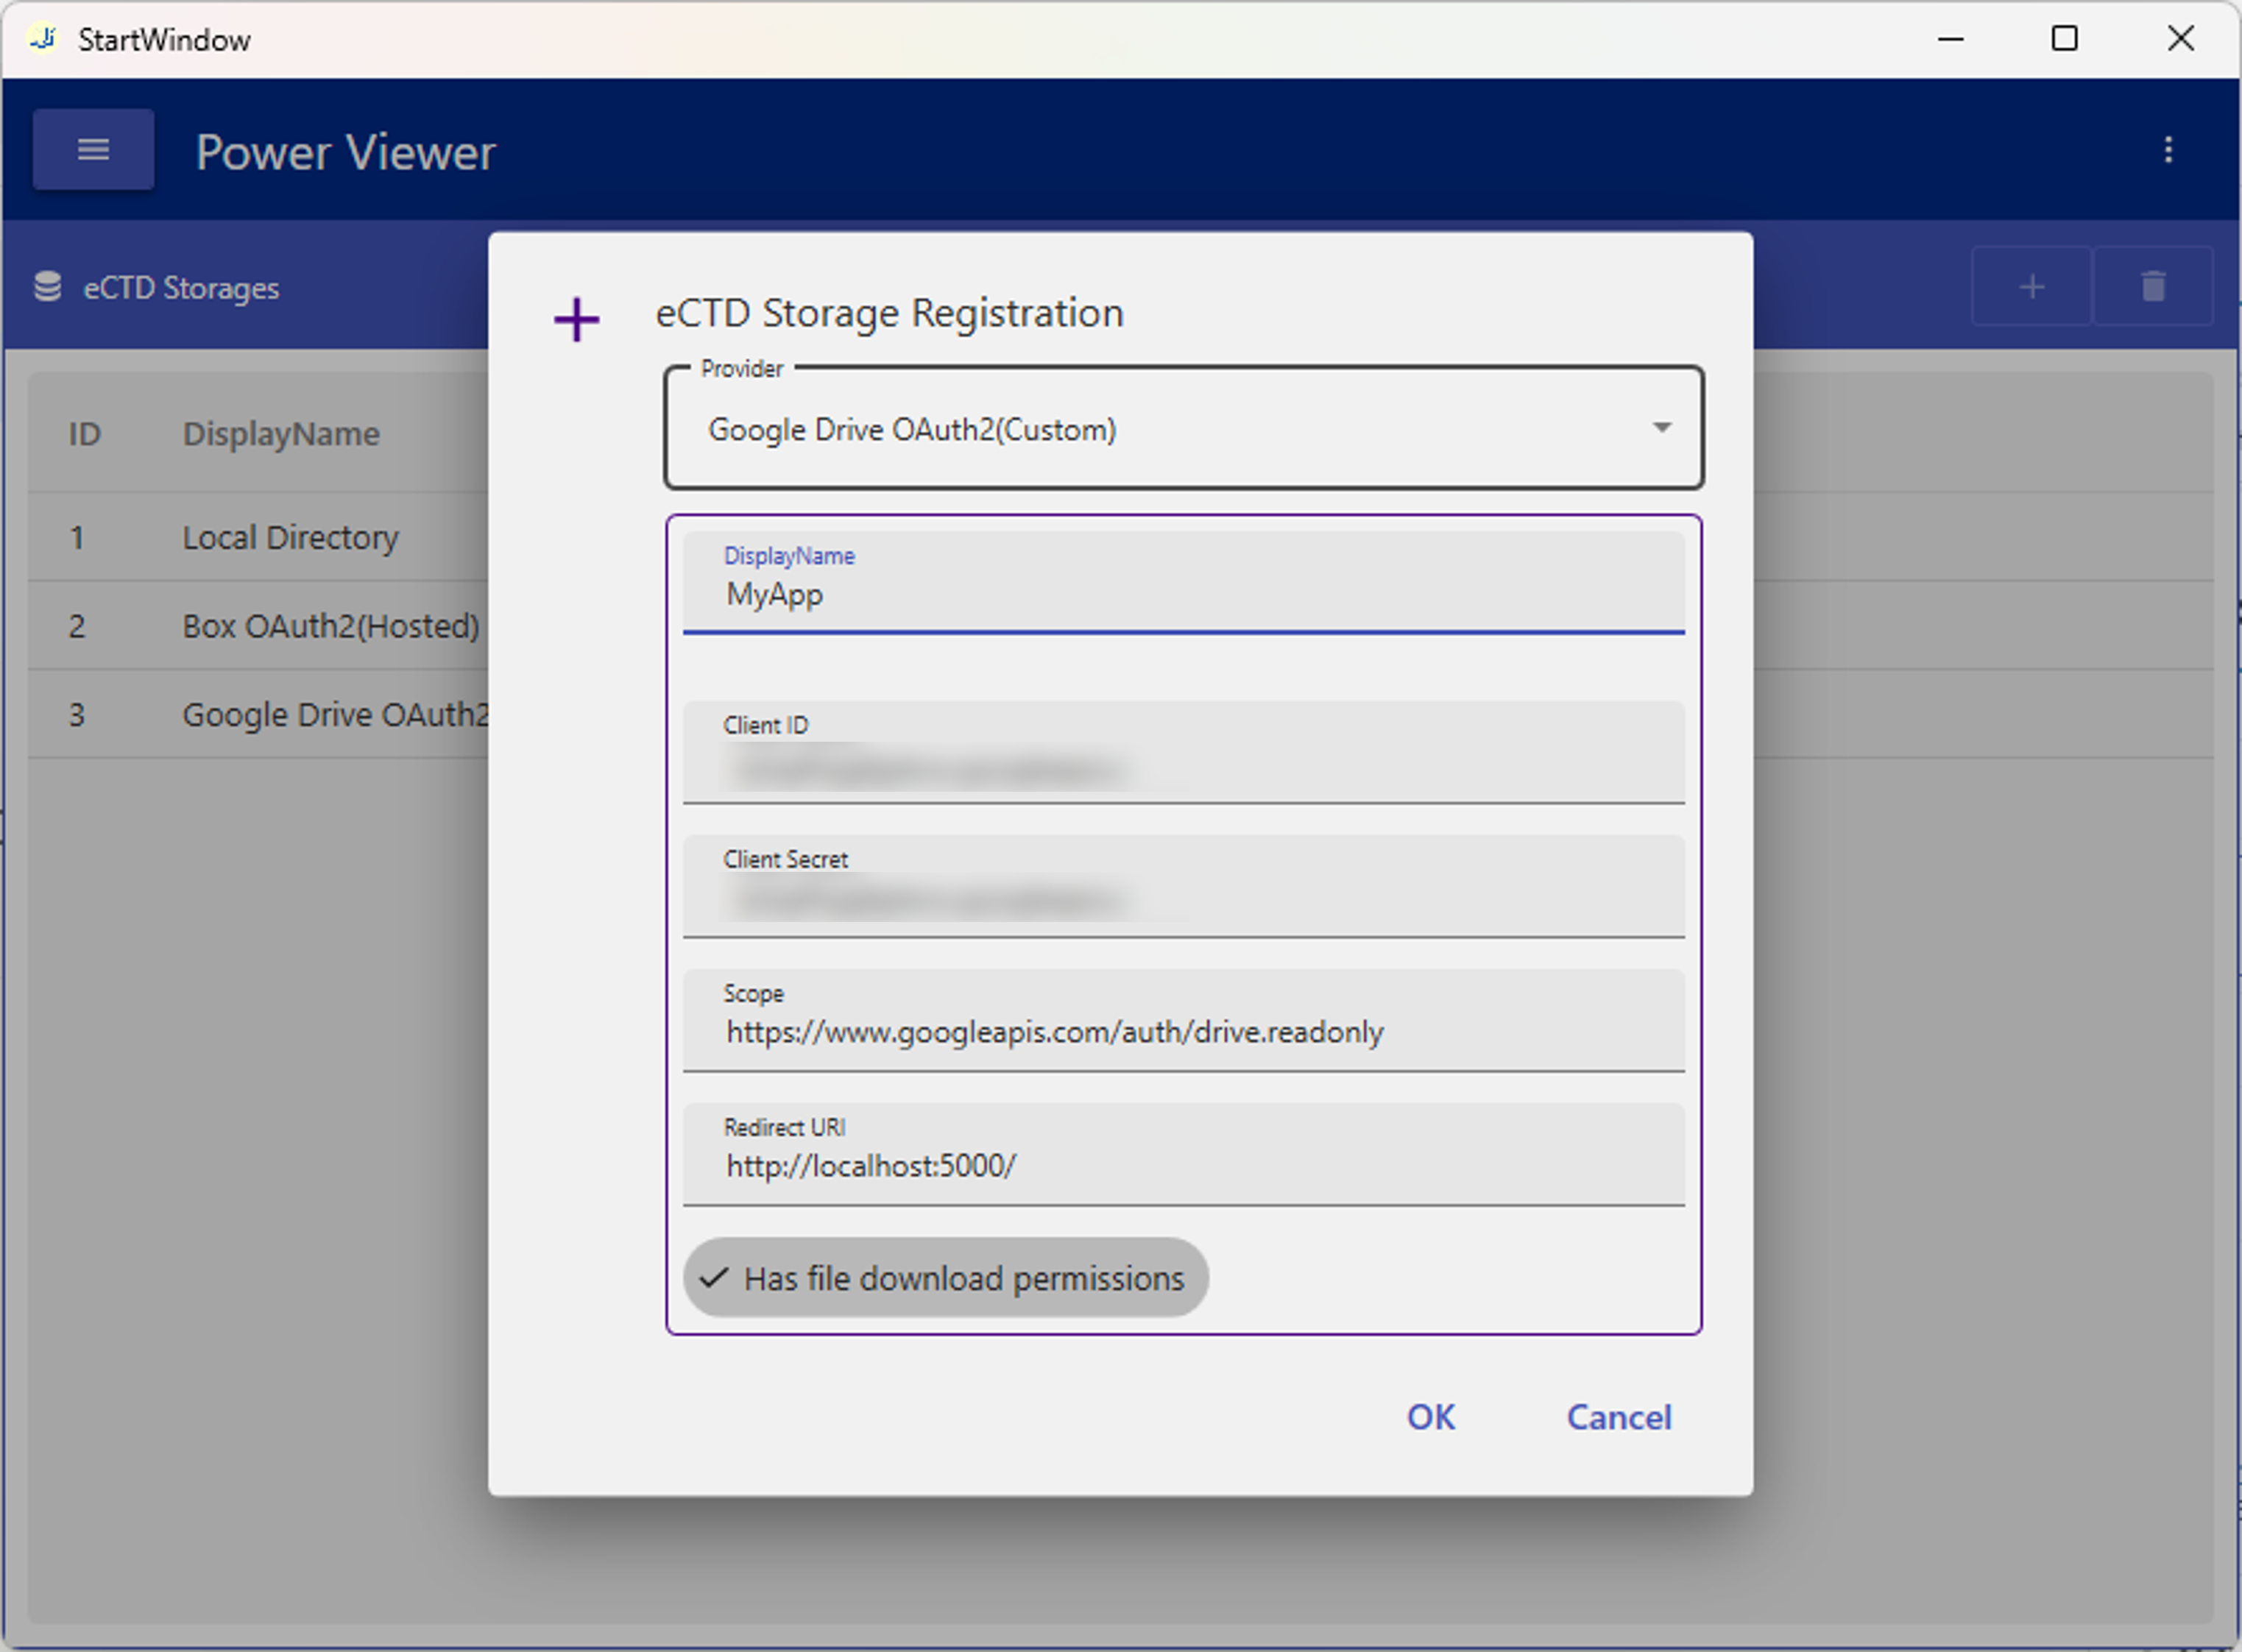
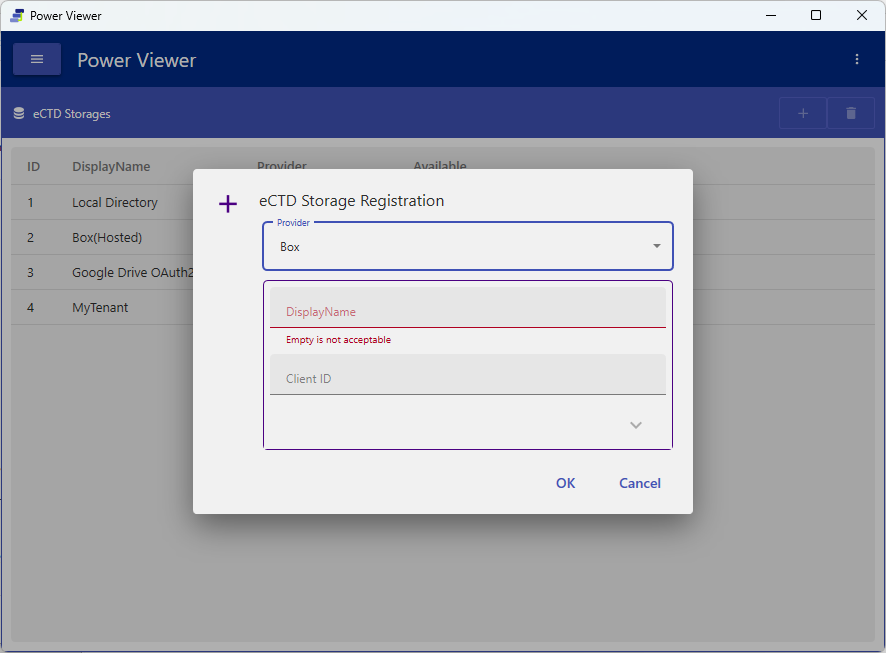
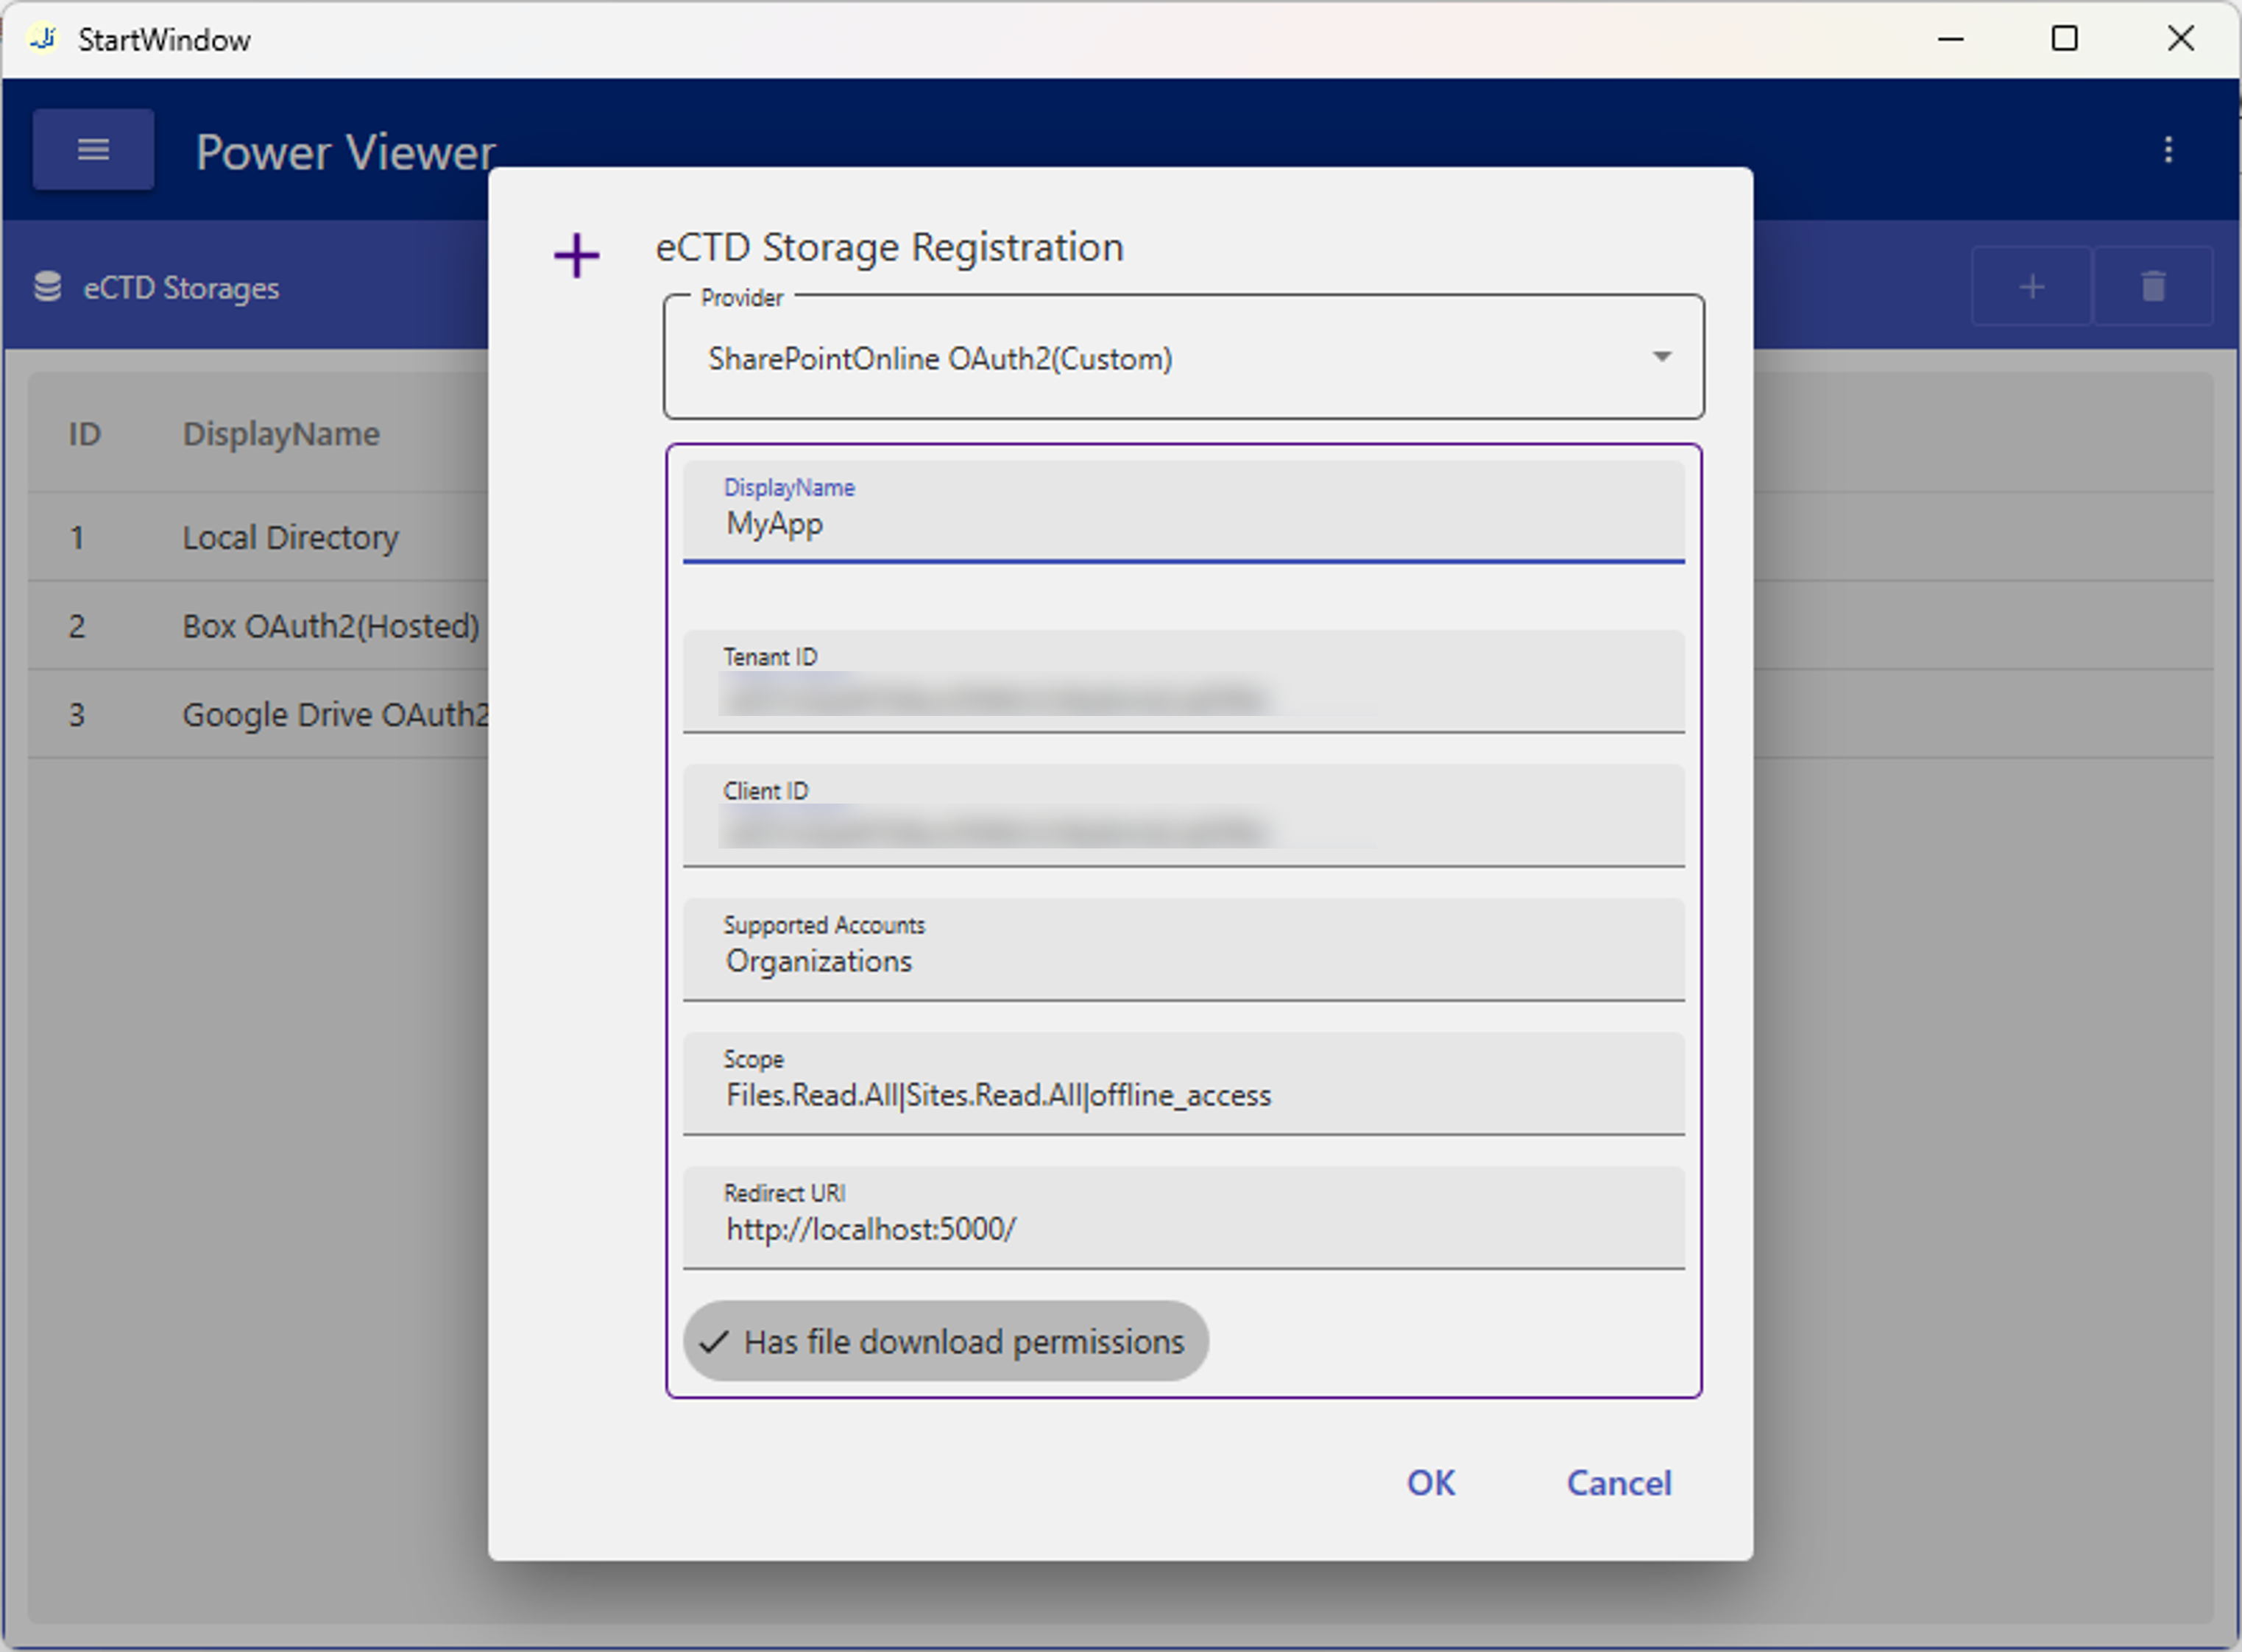
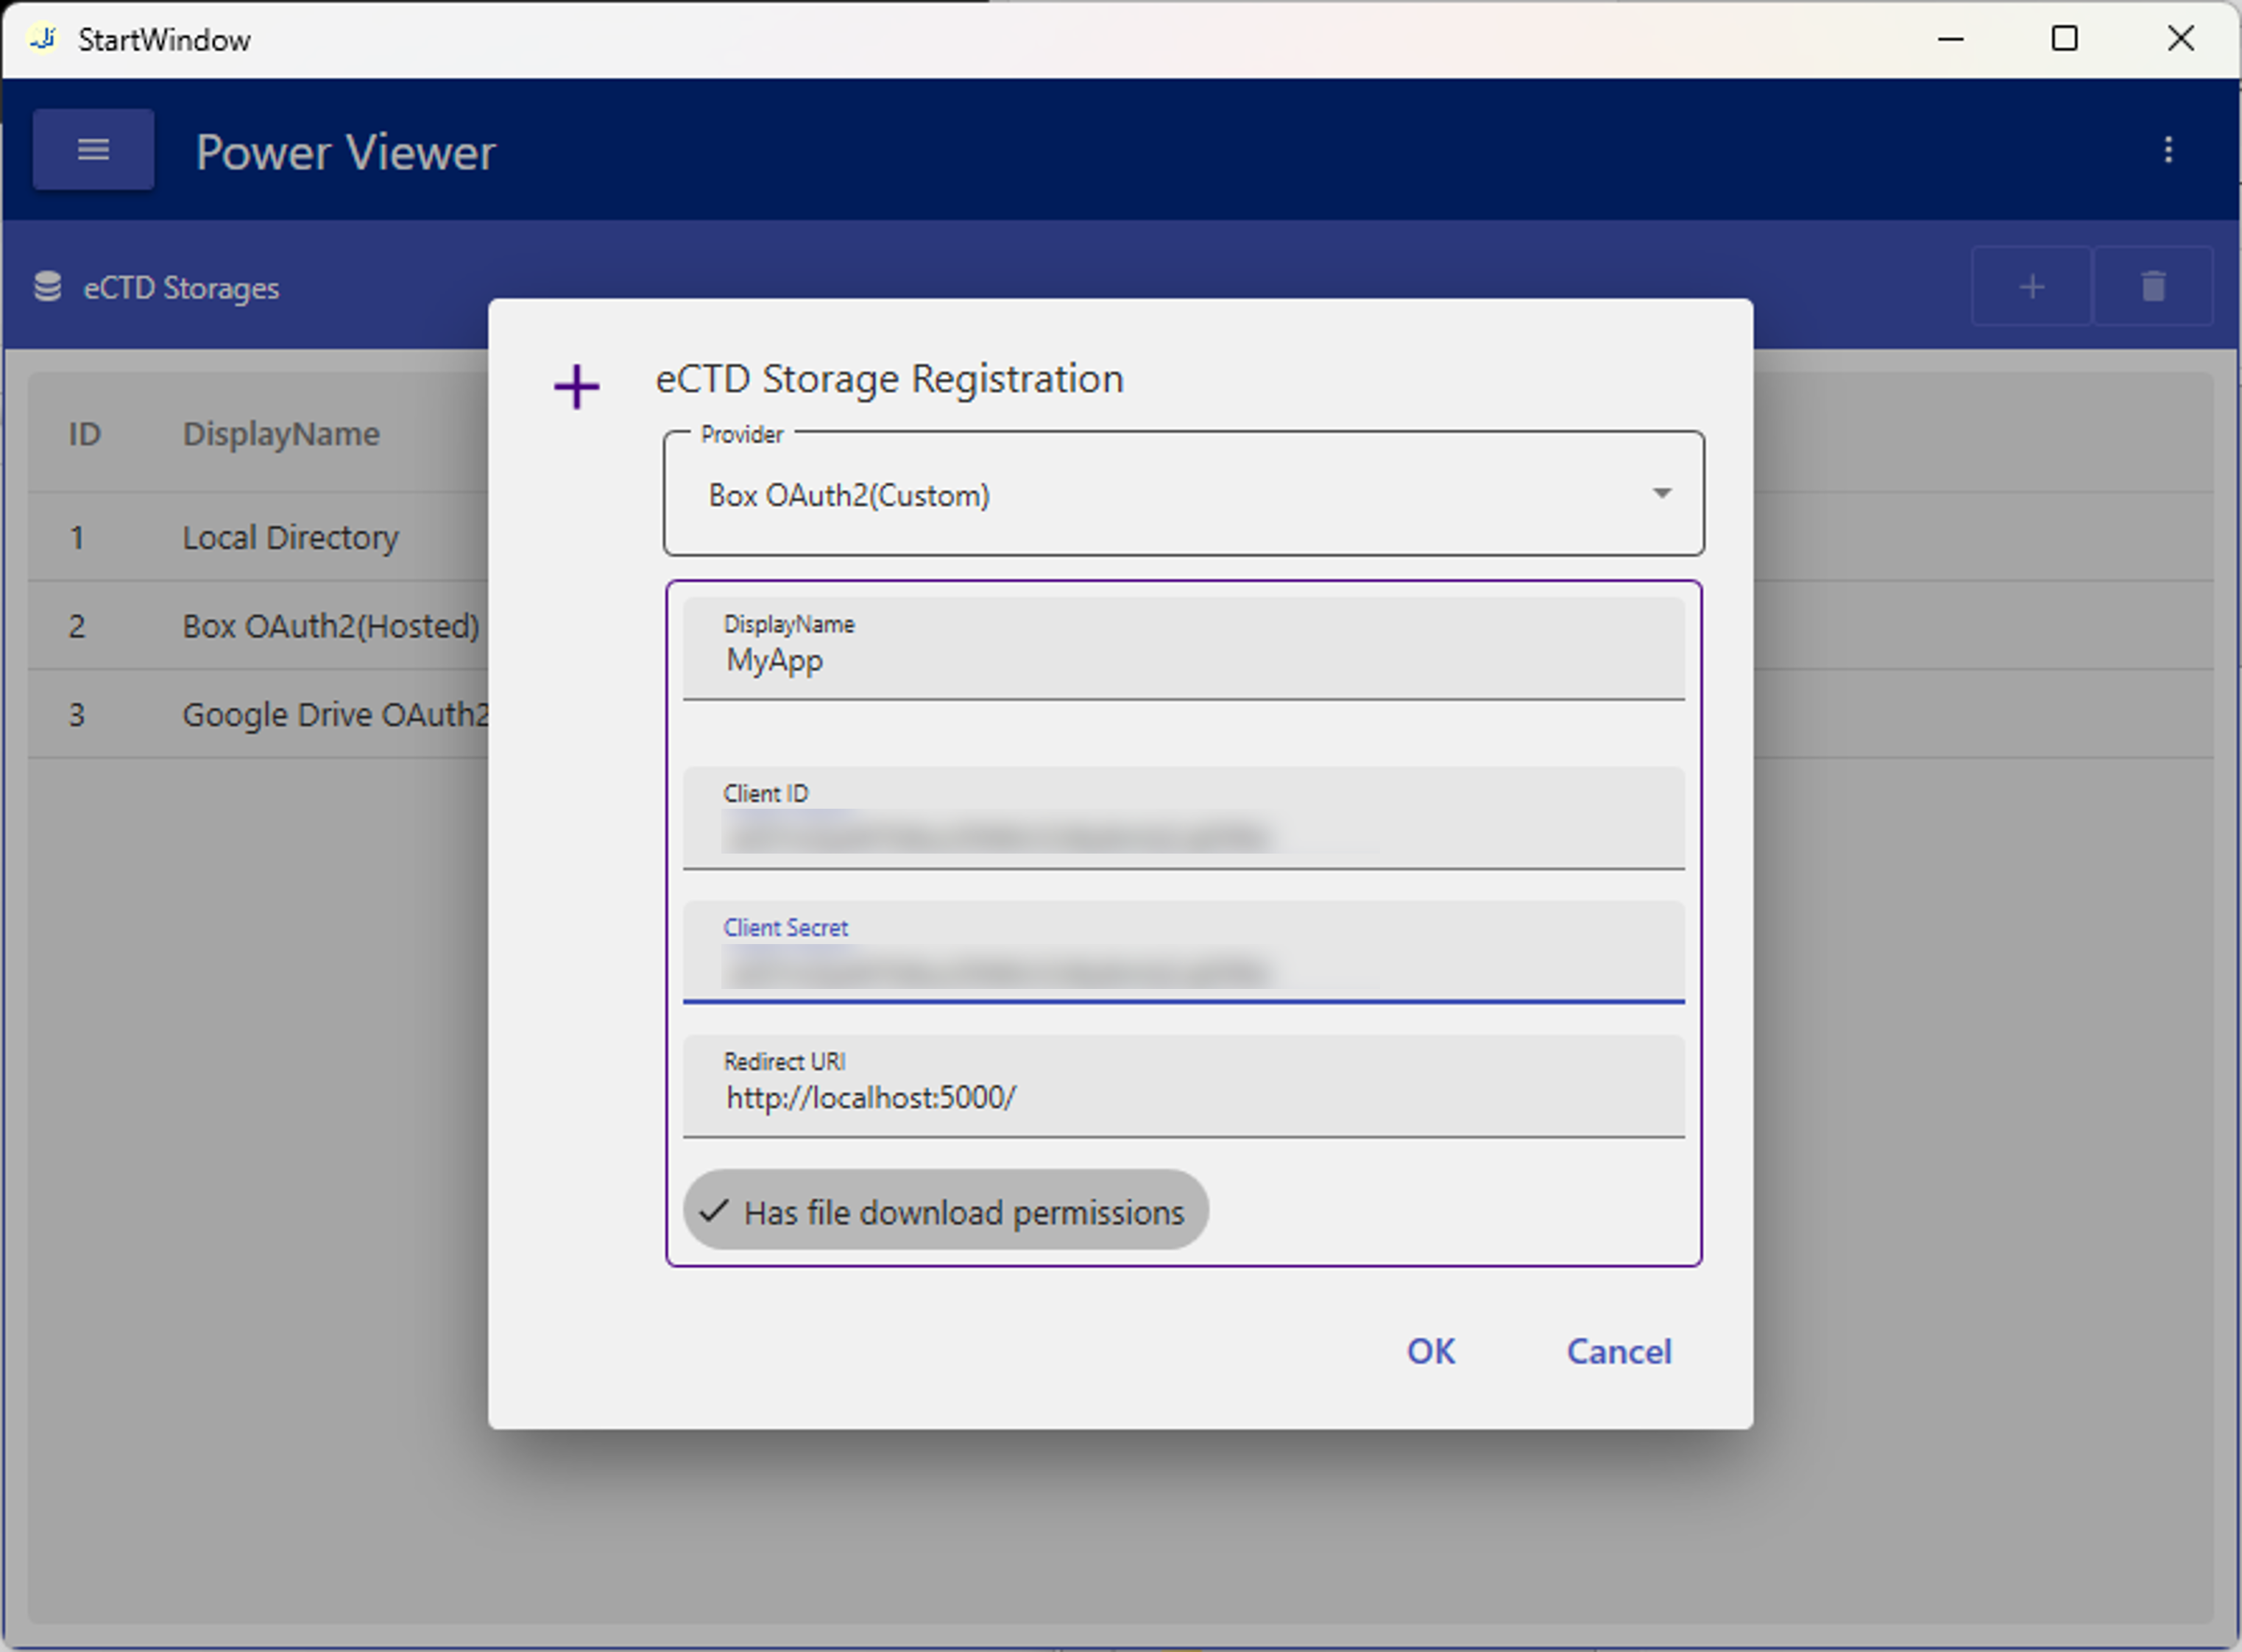
- Registration in Power Viewer — Enter the OAuth client information you prepared (Client ID, Client Secret, etc.) into Power Viewer’s eCTD Storage settings screen (Screen 2) to register it.
The following sections walk through these two stages in detail for each type of storage.
Screen layout
Adding a SharePoint Online eCTD Storage
To use SharePoint Online as an eCTD Storage, you must configure a storage-access application (OAuth client) based on OAuth 2.0 / OpenID Connect. There are two configuration methods:
- Custom
- Delegated Custom
The difference lies in who owns and manages the OAuth client (the API access application).
Custom
With the Custom method, you use an OAuth client that you own. You create the OAuth client in your own tenant and use its information to configure the eCTD Storage setting.
Use cases
- You want to own and manage the OAuth client in-house
- You cannot grant Admin Consent to an app owned by an external vendor
Prerequisites
- Entra ID administrator privileges are required
- What you create: an OAuth 2.0 client
- For the exact procedure to create an OAuth client, treat this page as reference only and refer to the official documentation (https://learn.microsoft.com/en-us/azure/healthcare-apis/register-application)
Procedure
-
Sign in with an Entra ID administrator account — https://entra.microsoft.com
-
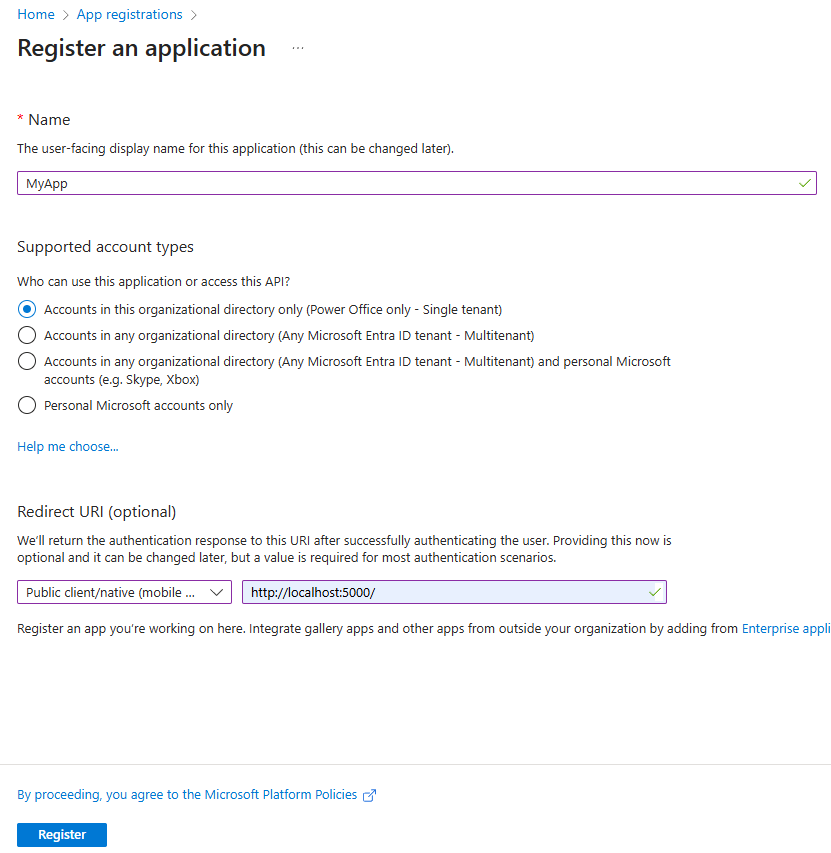
Create the app — Enter the app name, supported account types, and redirect URI, then register the app.
-
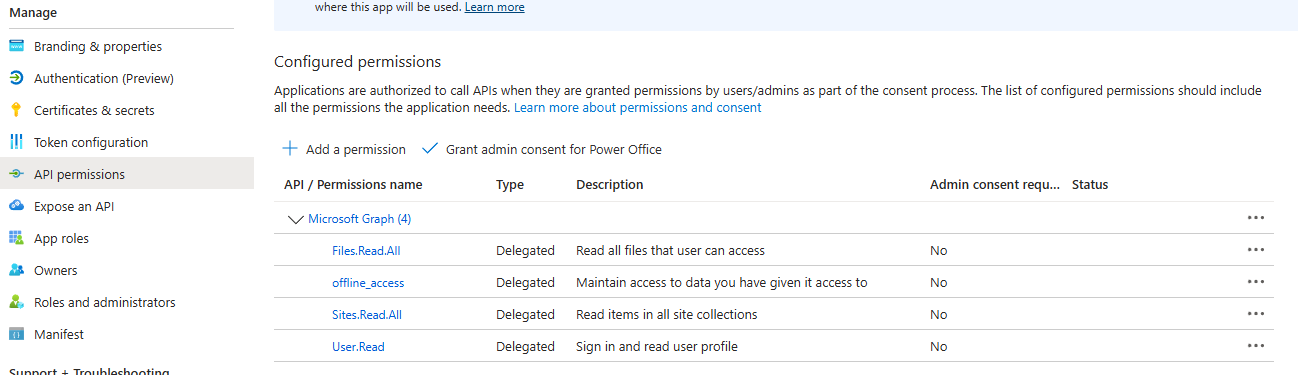
Configure scopes — Add the following scopes.
Files.Read.AllSites.Read.AllUser.Readoffline_access
-
Obtain the Tenant ID and Client ID — Retrieve the Tenant ID and Client ID.

-
Enter the OAuth client information in Screen 2 and add the eCTD Storage setting
Delegated Custom
With the Delegated Custom method, an OAuth client created by Power Office is registered in your tenant and used as a Custom client. It simply removes the effort of creating the OAuth client; mechanically it is the same as the Custom method.
Use cases
- You want to avoid the effort of creating and managing the OAuth client yourself
- You can register an OAuth client owned by an external organization in your own tenant
Preparation
This preparation must be performed by a tenant administrator (typically an IT department member, not the manager of the department that uses Power Viewer). As preparation, grant the OAuth client created by Power Office access to your tenant.
-
Click the admin consent link and sign in with an administrator account — The tenant administrator performs this once. You do not need to repeat it each time you add an eCTD Storage setting.
-
Grant access permission — Grant the app
PowerViewerSharePointOnlineOAuth2access to your tenant.
Procedure
-
Go to the Microsoft Entra admin center — https://entra.microsoft.com
-
Obtain the Tenant ID

-
Enter the Tenant ID in Screen 2 and add the eCTD Storage setting — Leave everything except the display name and Tenant ID at their default values, then add.
Adding a Box eCTD Storage
To use Box as an eCTD Storage, you must configure a storage-access application (OAuth client) based on OAuth 2.0 / OpenID Connect. There are two configuration methods:
- Hosted
- Custom
The difference lies in who owns and manages the OAuth client (the API access application).
Hosted
The Hosted application is created in advance by Power Office and is registered as a default. You do not need to add an eCTD Storage setting.
Use cases
- You have no special requirement to manage the authentication app in-house
- You can allow an OAuth client owned by an external organization
- It is difficult to arrange the privileges required to register an app (Box administrator)
Custom
With the Custom method, you use an OAuth client that you own. You create the OAuth client in your own tenant and use its information to configure the eCTD Storage setting.
Use cases
- You want to own and manage the OAuth client in-house
- You cannot grant Admin Consent to an app owned by an external vendor
Prerequisites
- Box administrator privileges are required
- What you create: an OAuth 2.0 client (Custom App)
- For the exact procedure to create an OAuth client, treat this page as reference only and refer to the official documentation (https://developer.box.com/)
Procedure
-
Sign in to the Box Developers Console with an account that has app management privileges — https://app.box.com/developers/console
-
Create a custom app — Create it with the following settings.
Item Value App name Any Description Any Purpose Integration Category Collaboration External system to integrate Power Viewer App creator Customer Authentication method User authentication (OAuth 2.0) 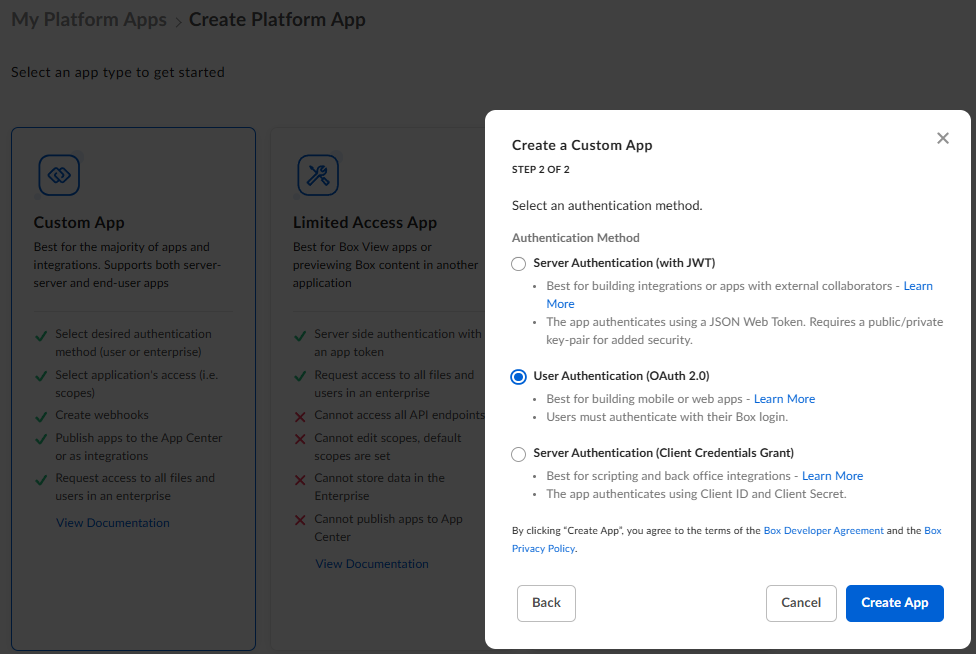
-
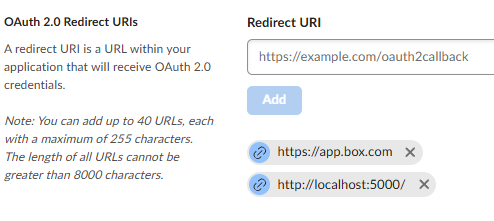
Add a redirect URI — Specify any URI.
-
Edit the application scopes — Check “Content actions > Write all files and folders stored in Box”.
This setting is required to download data of files on Box (such as PDFs) and display them in the Viewer. Power Viewer never writes to Box resources.

-
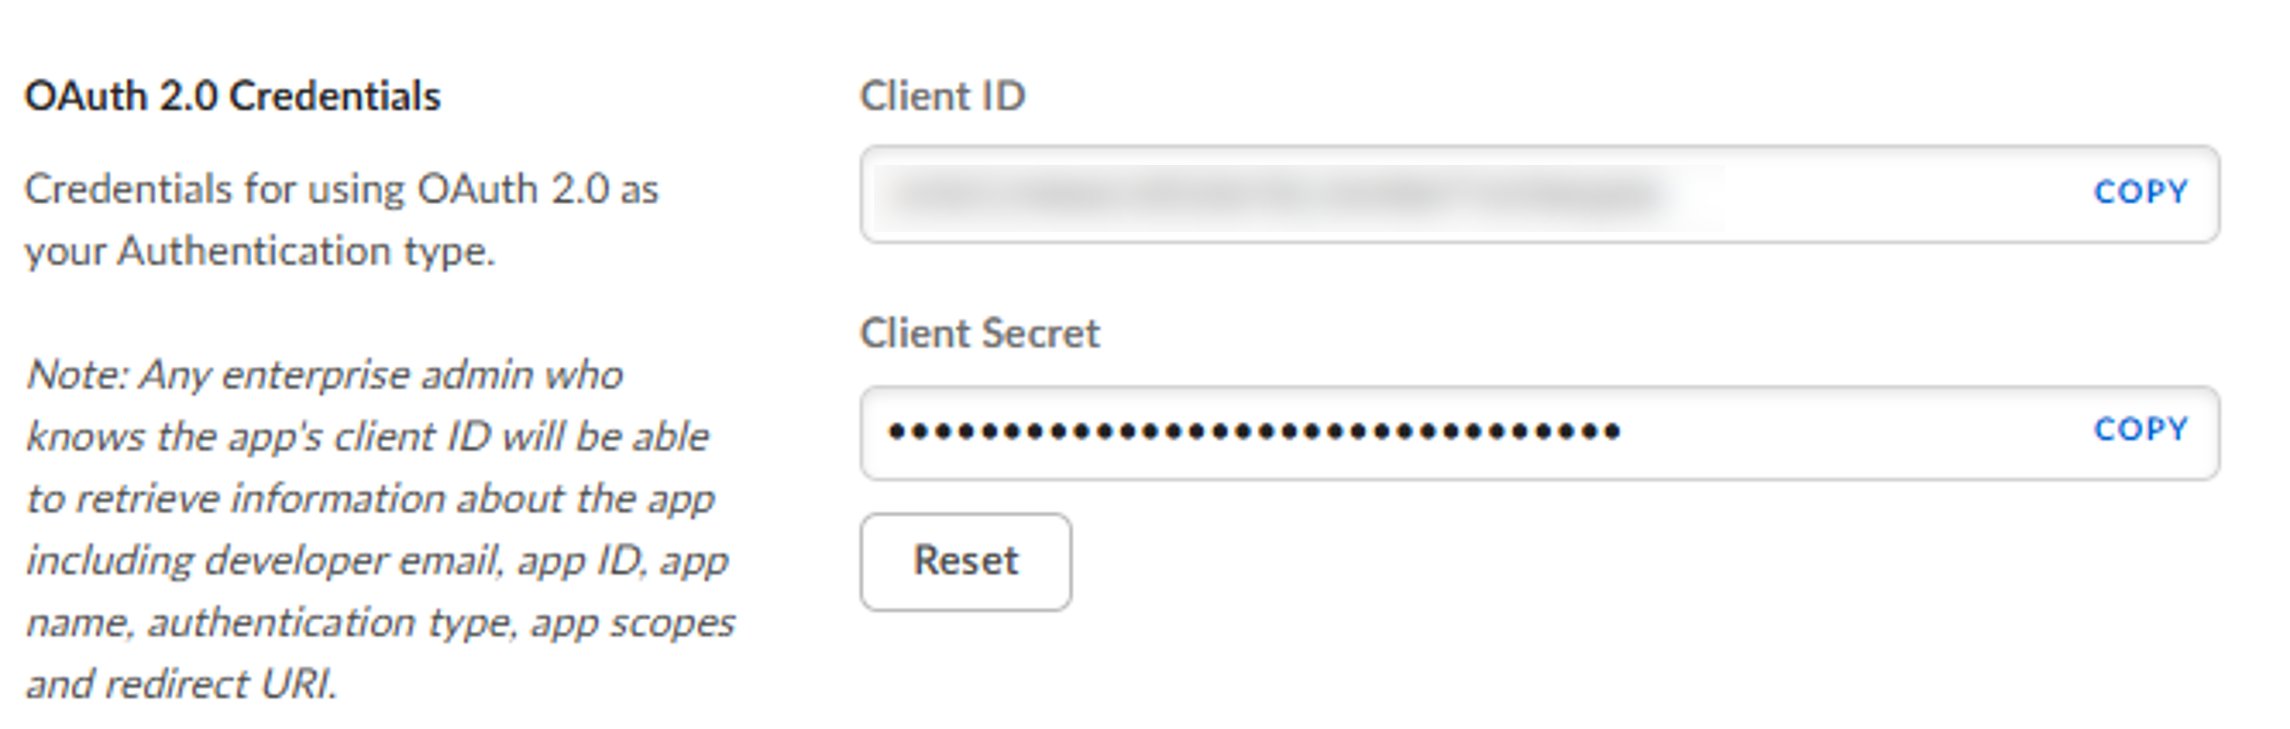
Obtain the Client ID and Client Secret — Retrieve the Client ID and Client Secret. You register this information in Power Viewer.
-
Enter the OAuth client information in Screen 2 and add the eCTD Storage setting
Adding a Google Drive eCTD Storage
To use Google Drive as an eCTD Storage, you must configure a storage-access application (OAuth client) based on OAuth 2.0 / OpenID Connect.
For Google Drive, unlike other cloud storages, only Custom is available.
Custom
Prerequisites
- Google Workspace administrator privileges are required
- What you create: an OAuth 2.0 client
- For the exact procedure to create an OAuth client, treat this page as reference only and refer to the official documentation (https://console.cloud.google.com/)
Procedure
-
Sign in to the Google Cloud Console — https://console.cloud.google.com
-
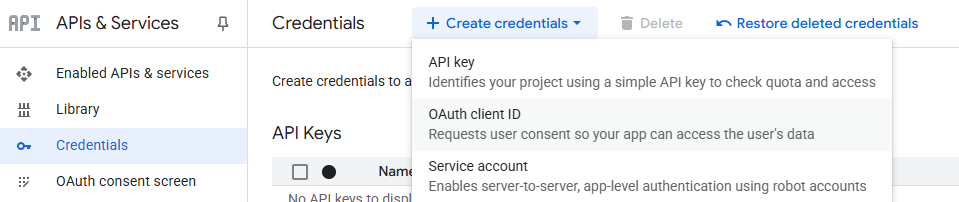
Add an OAuth client ID
-
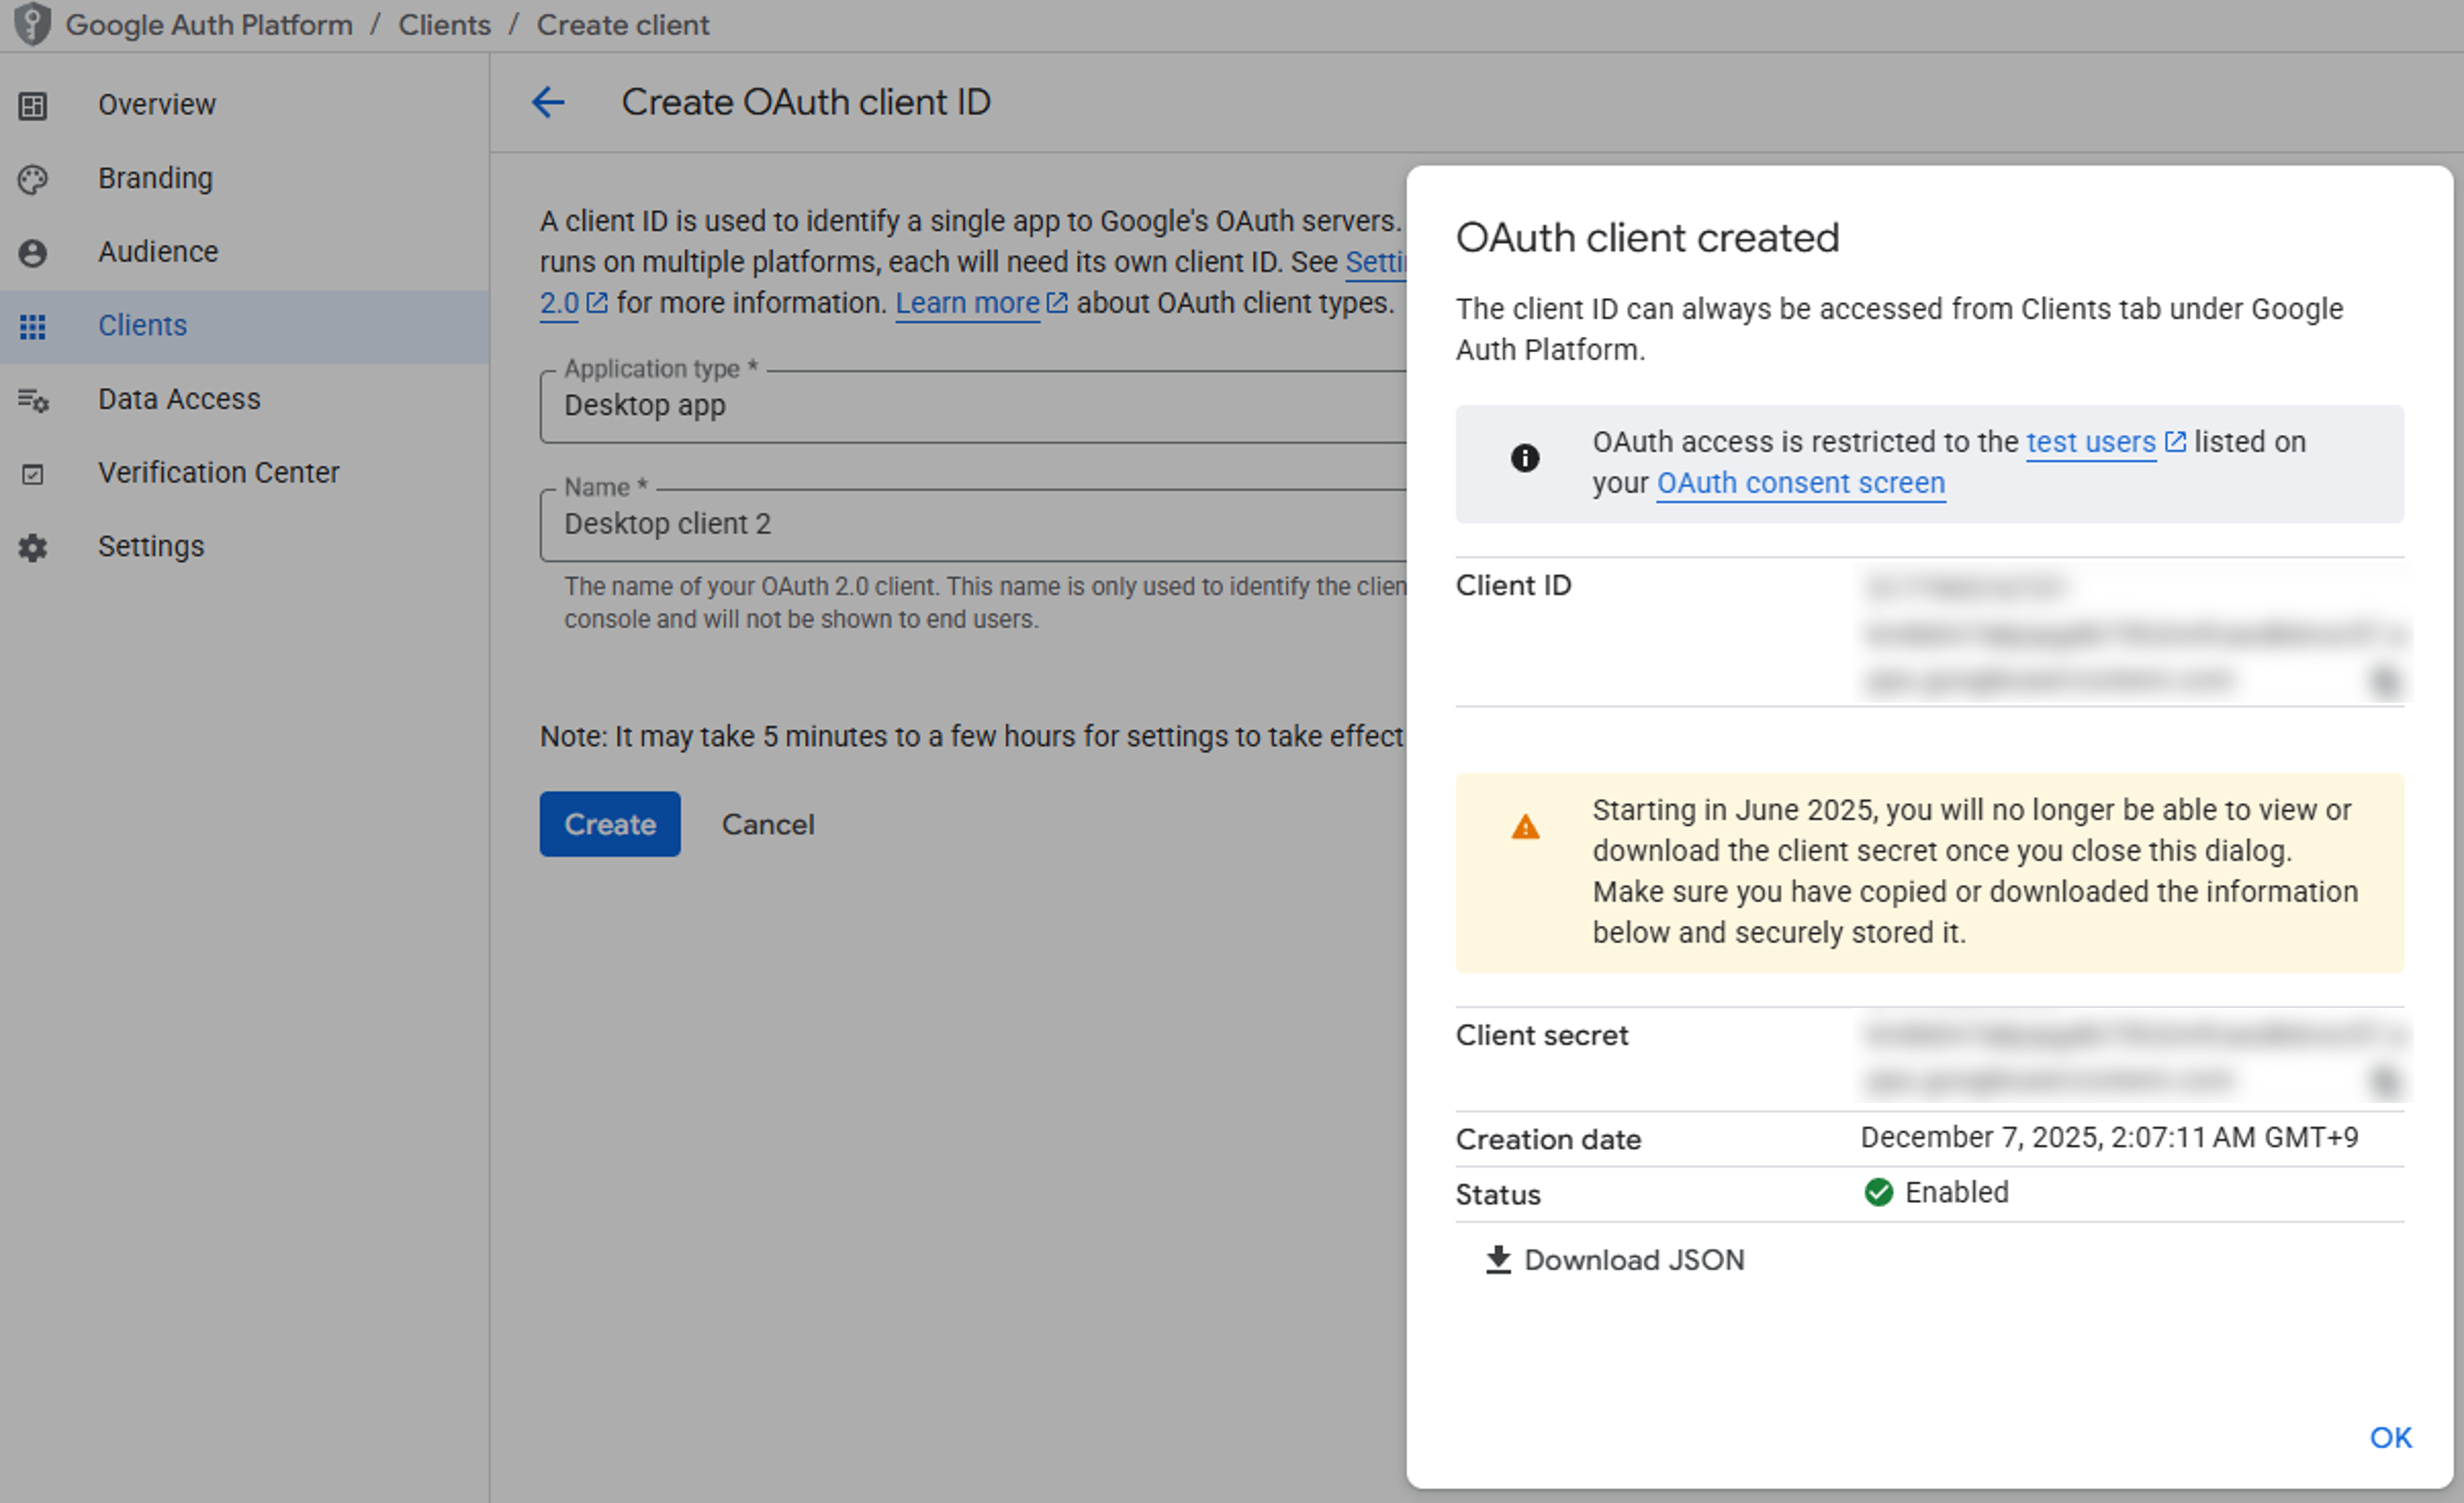
Obtain the Client ID and Client Secret
-
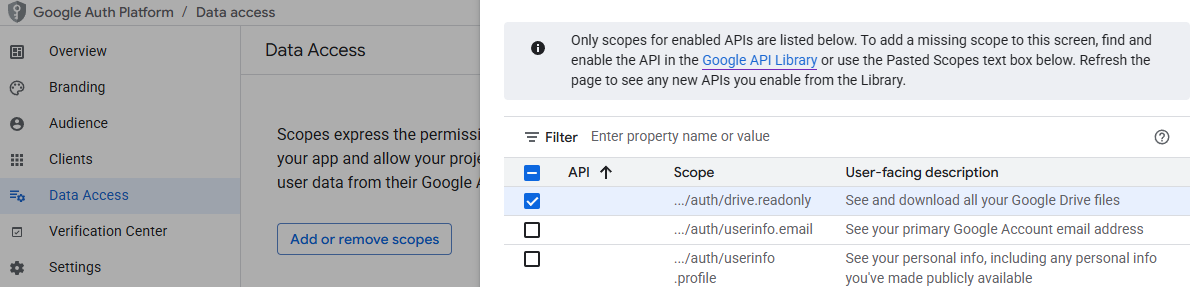
Add scopes — On the Data Access tab, add the following scope.
…/auth/drive.readonly
-
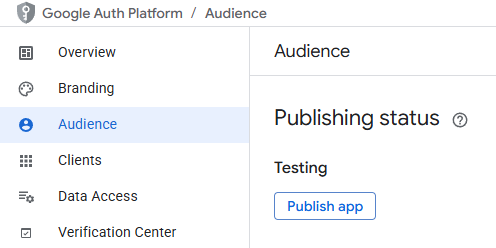
Publish the app
-
Enter the OAuth client information in Screen 2 and add the eCTD Storage setting